? Changing DNS servers in Windows 11 is important for users who want to improve Internet speed, security, or access to certain websites. DNS (Domain Name System) serves as the Internet's phone book, translating website addresses into computer-understandable IP addresses. The standard DNS servers provided by your Internet Service Provider (ISP) may be slow or unreliable. By changing DNS, you can improve page load times and protect yourself from some types of attacks.
Best free public DNS servers:
- Cloudflare: 1.1.1.1, 1.0.0.1.
- Google: 8.8.8.8, 8.8.4.4.
- Adguard: 94.140.14.140, 94.140.14.14194.140.14.141.
Servers with blocking ads and trackers: 94.140.14.14, 94.140.15.15. - Control D: 76.76.2.0, 76.76.10.0.
To set DNS server, follow the next steps:
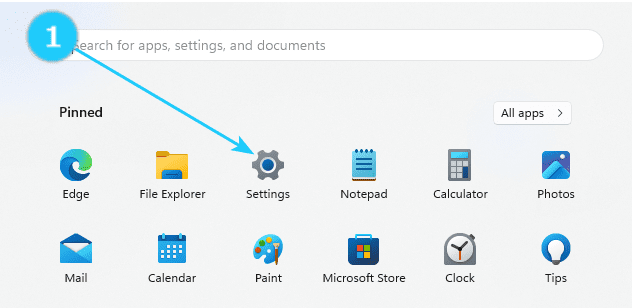
- Click on Start menu and type Settings. Open it.
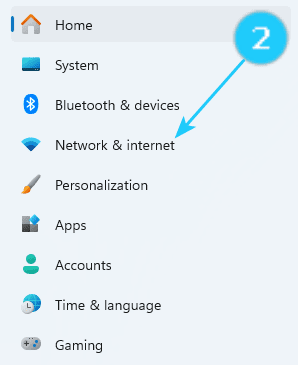
- Click on Network and internet on the left side.
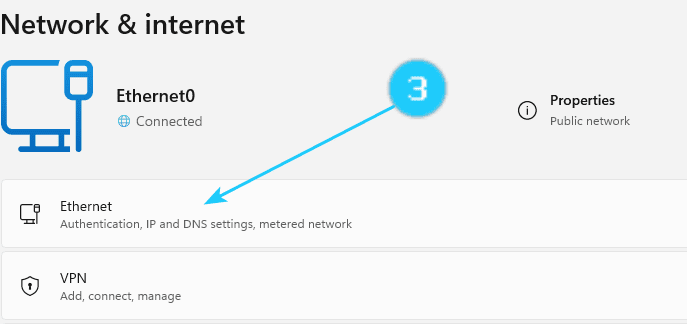
- Click on Ethernet in the open window.
- Scroll down and click on edit near DNS server assingment.
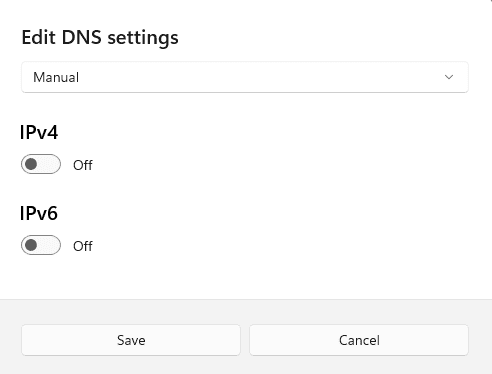
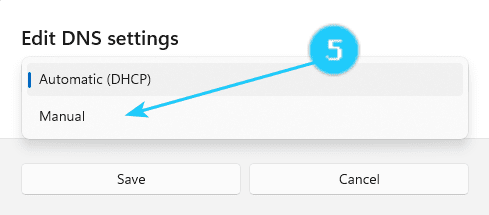
- Click on Manual in opened window.
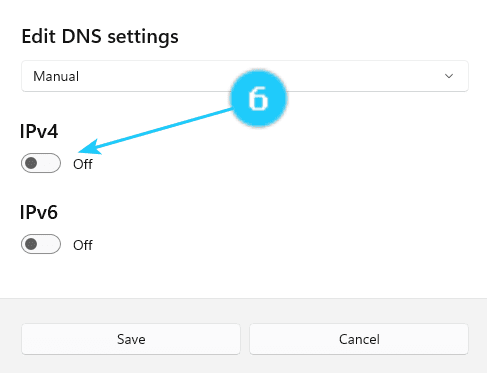
- Click on IPv4.
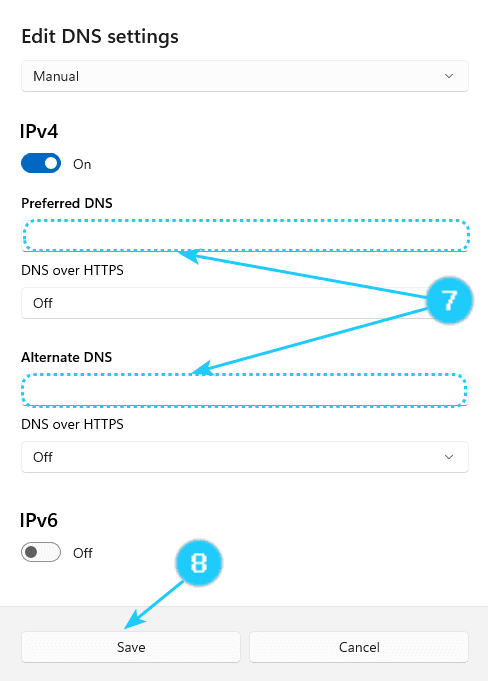
- Make the Preferred DNS server to be used at all times, as well as an Alternate DNS server.
(The second one is needed if the preferred one is unavailable.)
- Click on Save.
