!To maintain the performance of SSD drives by clearing data from unused memory cells, there is a TRIM command.
When using it, further write operations are performed at the same speed without first deleting existing data in previously cleared cells.
In this article, we will tell you how to enable it.
To enable TRIM for SSD in Windows 11, just follow the next steps:
- First of all, you should check the TRIM status for your SSD drive
To do this, run fsutil behavior query disabledeletenotify in the command line as administrator.
The values 0 in the results indicate that TRIM is enabled and in use.
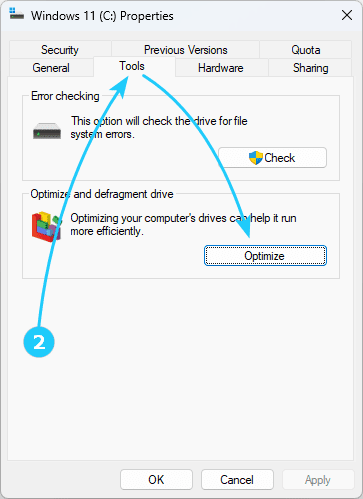
- Then you should enter the Properties of your drive by right-clicking on it in Explorer, then go to the Tools tab and click Optimize.
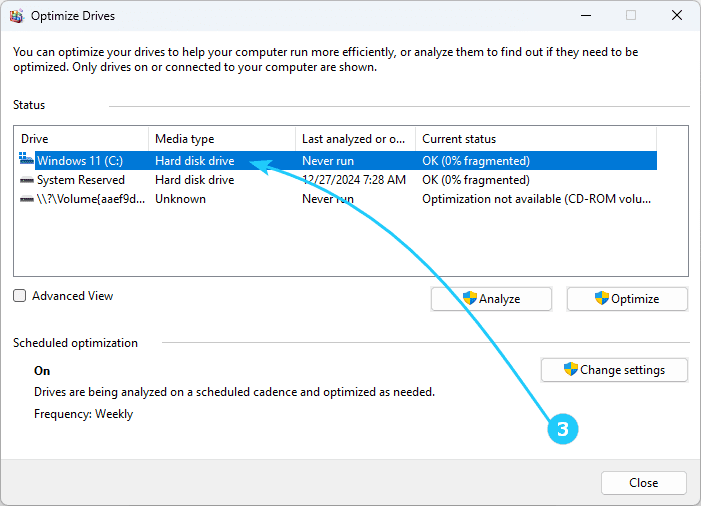
- In the next window, make sure that Media type is specified as solid-state drive, not hard disk.
- If the media type is determined incorrectly, run winsat diskformal in the command prompt as an administrator.
After running the command, it makes sense to go to the disk optimization window again and check that the media type is correct.
- If the media type is determined correctly, all that remains is to enable the TRIM option manually using commands run as administrator:
fsutil behavior set disabledeletenotify NTFS 0 enables TRIM for SSDs with the NTFS file system.
fsutil behavior set disabledeletenotify ReFS 0 enables TRIM for ReFS.


