By default, UAC is enabled and any user actions that can affect the operating system require confirmation.
However, sometimes it is necessary to disable UAC or configure it in a way that is convenient for you.
We will tell you how to do this below.
To disable or configure Windows UAC in Windows 11, just follow the next steps:
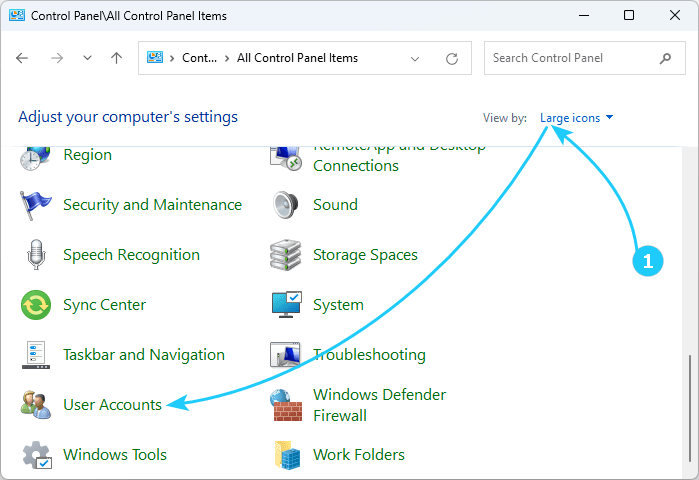
- First, you need to open the control panel using the combination Win + R and execute control.
Then in the window that opens, in the View by field, set Large icons, and then open the User accounts item.
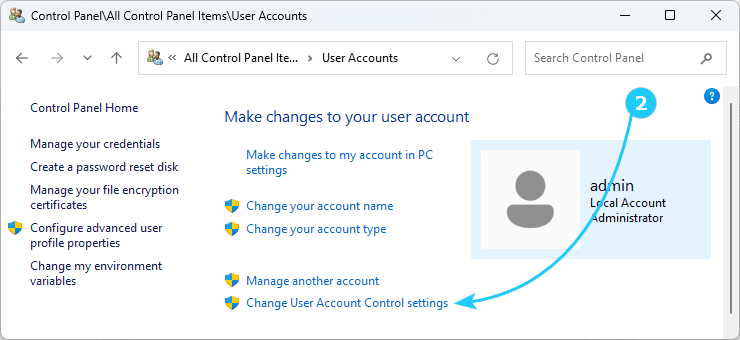
- In the next window, click Change User Account Control settings.
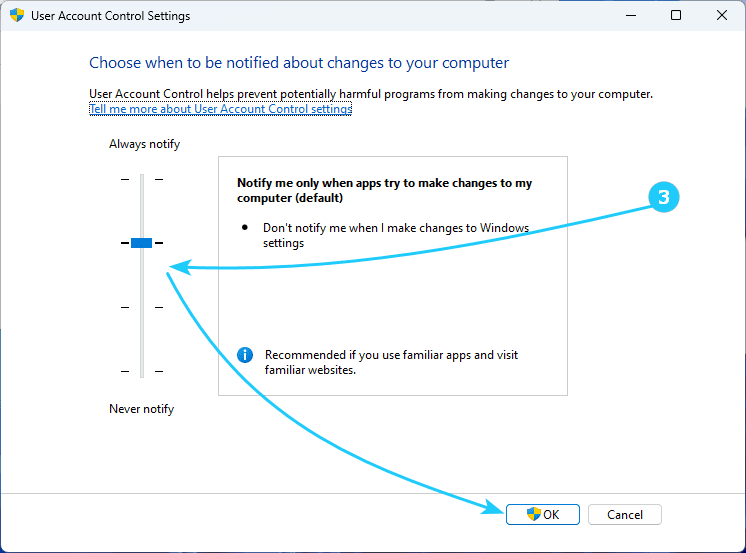
- After that, you can manually set UAC parameters or disable User Account Control.
Options for possible settings:
Always notify me — the safest option, you will receive a notification about any action that you take that could change something, as well as about actions of third-party programs. Regular users (not administrators) will have to enter a password to confirm the action.
Notify me only when apps try to make changes to my computer (default) — this option is set in Windows 10 by default. It means that only program actions are monitored, but not user actions.
Notify me only when apps try to make changes to my computer (do not dim my desktop) - Similar to the previous option, but the desktop is not darkened or blocked, which in some cases (viruses, Trojans) can be a security threat.
Never notify me — UAC is disabled and does not notify you of any changes to your computer settings initiated by you or programs.


