The idea behind it is to protect user privacy and security by encrypting DNS data sent between client and server devices.
This eliminates man-in-the-middle attacks since DoH uses HTTPS.
It requires a DoH-enabled server to resolve encrypted DNS requests from users.
In this article, we will show you how to enable secure DNS(DoH) on Windows 11.
To enable secure DNS (DNS over HTTPS) in Windows 11, just follow the next steps:
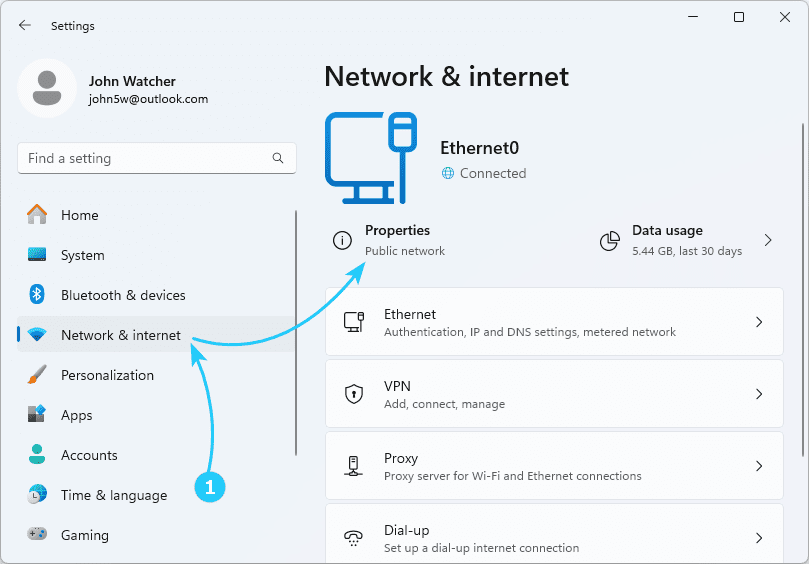
- First of all, launch Settings by pressing Win + I.
In the window that opens, go to Network & internet, and click the Properties button on the panel.
On the page that opens, click Edit in the DNS server assignment section.
In the drop-down list at the top of the new window, select Manual, below specify the addresses of DNS servers that support DoH by selecting from the list, and set the encryption type to Encrypted only (DNS over HTTPS).
List of servers that support DoH:
1.1.1.1; 1.0.0.1 for IPv4, 2606:4700:4700::1111; 2606:4700:4700::1001 for IPv6 - Cloudflare
8.8.8.8; 8.8.4.4 for IPv4, 2001:4860:4860::8888; 2001:4860:4860::8844 for IPv6 - Google
9.9.9.9; 149.112.112.112 for IPv4, 2620:fe::fe; 2620:fe::fe:9 for IPv6 - Quad9
After setting up, all that remains is to click the Save button. If the settings are correct, you will see the Encrypted mark after the DNS address on the Properties page in Network & internet.
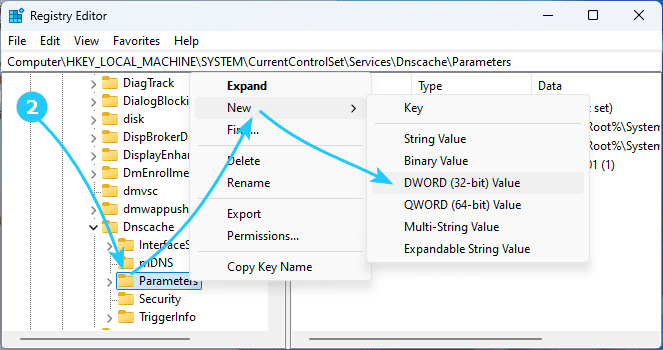
- You can also enable DoH using the registry editor, for which you should use the key combination Win + R and run regedit.
Then in the registry editor tree, go to HKEY_LOCAL_MACHINE\SYSTEM\CurrentControlSet\Services\Dnscache\Parameters.
In the right panel, right-click and select New -> DWORD 32-bit Value from the menu, then name the newly added key EnableAutoDoh and set its value to 2.
Then you will need to select DNS servers that support this technology from the list above.
To do this, you can use the scheme described in the previous step, or use the key combination Win + R and execute control, launching the classic Control Panel.
In the Control Panel, go to Network and Internet -> Network and Sharing Center and click on Change adapter properties, where in the properties of your connection for the protocol used, specify the DNS server addresses.
For the changes to take effect, you will need to reboot the computer.