? Windows System Restore is an important feature that helps users get their computer back to working condition after failures or problems. In the life of every PC owner, there may be situations when the system starts to work incorrectly: errors appear, a program does not start, or the computer simply "freezes." In such cases, the recovery function allows you to quickly and effectively deal with problems.
➜The benefit of the System Restore setting is that you can create restore points - a kind of "snapshot" of the state of your operating system at a certain moment. If something goes wrong after installing new software or updates, you can revert to a more stable system version. This saves time and effort by eliminating the need to reinstall Windows and customize everything.
➜In addition, system restore can save important files and documents from being lost, as many problems can be resolved without losing data. Customizing this feature is an easy and effective way to ensure the security and stability of your operating system.
To configure Windows System Restore, follow the next steps:
- Open Start menu on your computer.
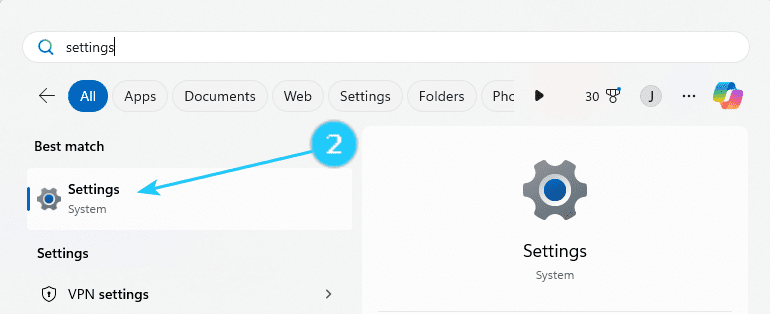
- Type Settings and click on it.
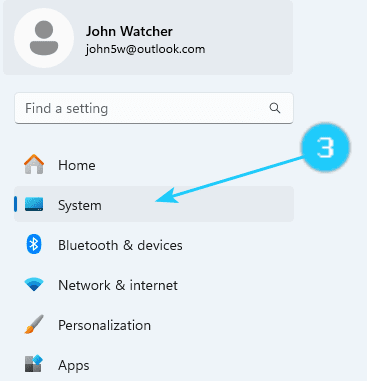
- Click on System on the left side in the open window.
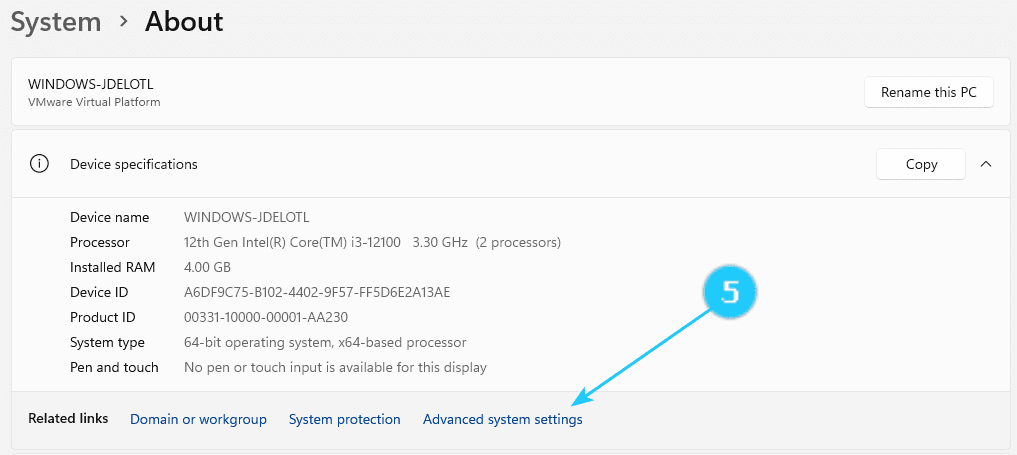
- Scroll down and click on About.
- Click on Advanced System Settings.
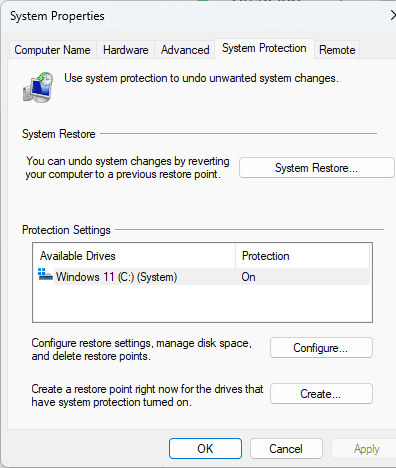
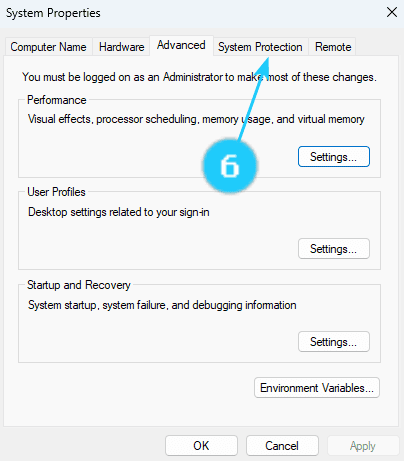
- Click on System Protection.
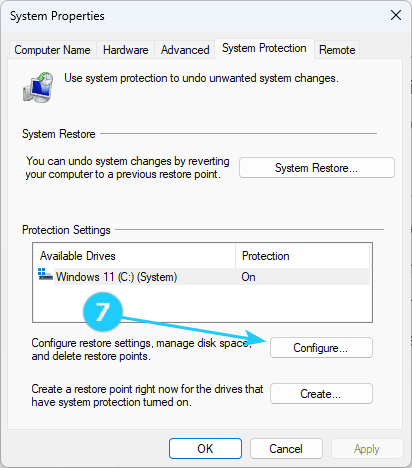
- Select the disk for which you want to configure recovery (usually the C: drive) and click on Configure...
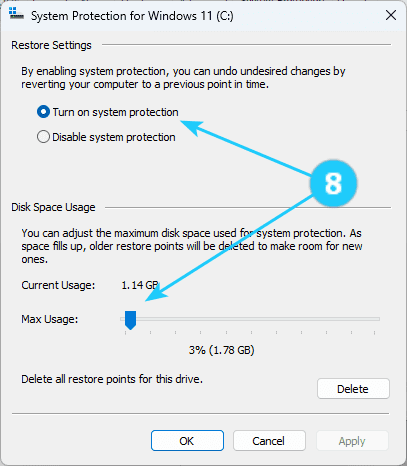
- Select "Turn on System Protection" and set the amount of disk space to be used for backups.
- To manually create a restore point, go back to the previous page and click "Create..", enter a description and click on "Create".
