!Windows automatically creates a restore point before most changes are made to your system. It helps you quickly restore your system to a previous state if something goes wrong. For example, a restore point is created before installing Windows updates, unsigned drivers, or programs.
Also, if there have been no other automatic restore points every seven days, the system creates a new one to ensure that you always have the option to roll back in case of malfunctions.
Restore points are a sort of "snapshot" of your computer that preserves the settings and installed programs at the creation time. If you have problems after some change, you can use these points to return your system to a state where everything works fine.
To create the System Restore Point, follow the next steps:
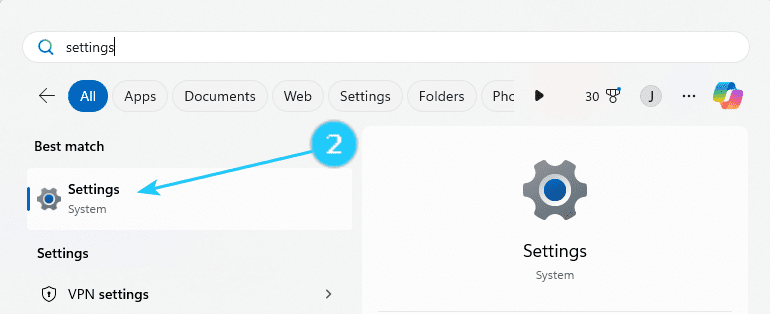
- Open Start menu on your computer.
- Type Settings and click on it.
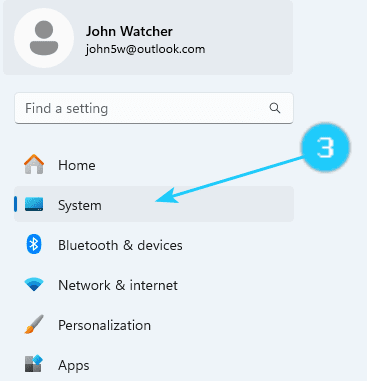
- Click on System on the left side in the open window.
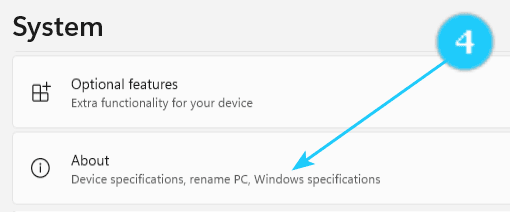
- Scroll down and click on About.
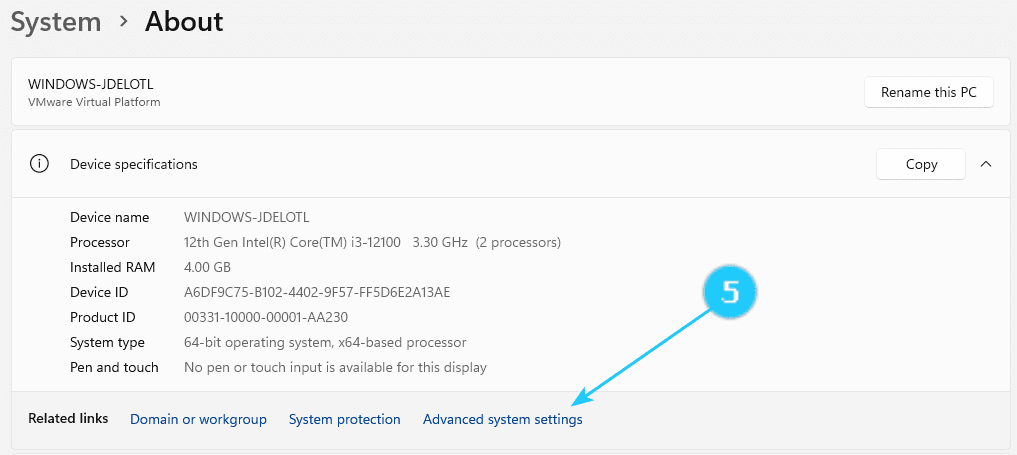
- Click on Advanced System Settings.
- Click on System Protection.
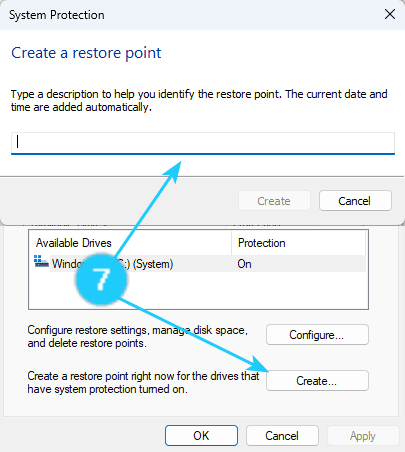
- Click on the button labeled Create… and then give it a name that will help identify what the point is for.
- Then click Create.